Company ID Maintenance
From Adjutant Wiki
General Information
Default Menu Location Maintain >> System >> CID Maintenance
Screen Name CIDMAINTENANCE
Function The Company ID (CID) Maintenance Screen is used to maintain general system and accounting information for your company. For further detail on CID options throughout the set up see the CID Setup Options page.
Master
The Master tab displays basic information about the company. This information is commonly used on reports and forms.
Fields
CID: Company ID
Company: Company name
Address, Country, Phone, Fax, Email: Company address and contact numbers (These fields appear on several forms, including sales orders and invoices.)
Master ENT: The same Code as entered in the Organization Screen for your organization
Paths/Remote Transfer
The Remote Transfer tab is used to supply network directory information for folders that Adjutant commonly uses.
Adjutant will display a warning message at login if it cannot locate these folders.
Accounting Backend
The Accounting Backend tab contains information about a third party accounting package if one is in use.
The Posting Window field controls when transactions can be posted in the system. Any transaction (invoice, cash receipt, check, inventory transfer, production, etc) must be executed with an accounting date that falls within the posting window.
Fields
Name: Name of the accounting software
- Note: Can not be left blank, must have one of the drop down options selected.
Backend Type: Server type
- Note: Can not be left blank, must have one of the drop down options selected.
Path to SYS Files: Location of accounting software on server
Company ID: ID of the company in accounting software
Database Name: Name of the accounting database
WIP Account: Work in Process account number
PR Clearing: Payroll Clearing account number
Equip Clearing: Equipment Clearing account number
Path to PR SYS Files: Location of payroll software on server
PR Company ID: ID of company in payroll software
PR Database Name: Name of the payroll database
Posting Window: Transactions may only be posted within the dates entered here.
Default Costing Method: The costing method that Adjutant will use to value your inventory.
Map/Password Info
The Map/Password Info tab is used to supply internet mapping and latitude longitude information for your organization's location.
It also controls the default password settings for users.
Fields
Internet Mapping Encoded Address: Use the format above to set this up
Latitude: Actual latitude of your organization
Longitude: Actual longitude of your organization
Password Settings will apply to all NEW users!
Require Letters: This box requires letters in the user's password
Require Numbers: This box requires numbers in the user's password
Require Other: This box requires characters other than numbers and letters in the user's password
Max Length: Maximum number of allowable characters for the password
Min Length: Minimum number of allowable characters for the password
Expire In: Number of days the password will expire in
Never Expire: Checking this box never expires passwords
Reuse In: Reuse passwords (after expiration) in this number of days
Lockout After: Number of attempts the user has to enter the correct password before the system locks them out
Lockout For: Number of minutes to lock the user out after incorrectly entering his/her password.
Defaults
The Defaults tab is used to set some of your company's default settings.
Fields
Schedule Offset: Number of days in the future the task will be scheduled by default
Task Start Time: Default time a task will start if no time is entered
Task Duration: Default duration of a task
Starting Point on Task: The field cursor will start in on a Task Entry Screen when it is opened
Labor Burden: Estimated labor burden percentage (Used on reports)
Screen Color: Screen color when using this CID
RSS Feed: Enter the URL of an RSS feed to be displayed on the Adjutant desktop (This can be overridden per user in the User setup.)
AR Credit Limit: Enter the default credit limit amount for new customers. [anchor|#cidcreditlimit]
Expense Mileage Rate: The reimbursable mileage rate that is used in the Expense Reporting system.
Web Session Timeout: The number of minutes of inactivity required before automatically logged out of Adjutant Web/CRM.
Default Org Country: The default country for all new Organizations.
Counters
The Counters tab allows you to change the next auto-generated number for all of the different forms in Adjutant.
- Any prefix entered will be displayed before the number with a dash after it
- Any suffix entered will be displayed after the number with a dash before it
- For example, if this was entered: Prefix = SO, Current Number = 5421, Suffix = BP
The next auto-generated number would be SO-5422-BP
- To change the number, type directly in the grid and click the Update button (If the Update button is not highlighted, you do not have the security required to change the number.)
Fields
APINVNO: AP Invoice number
BIDPO: Bid PO/Vendor Inquiry
BOL: Bill of Lading
GLBATCH: GL Batch number
INVNO: Invoice number
LOTNO: Lot# on PO Receipts (only if POAUTOLOT setup option is selected)
PONO: Purchase Order
RFQNO: Customer Quote
SONO: Sales Order/Work Order
TASK: Service Order (if TASKNEWSEQ setup option is selected)
WONO: Production Work Order
Accounts
The Accounts tab contains the system default GL accounts for many different transactions.
It also allows you to setup the GL Mask and Number of Periods in a Fiscal Year.
The GL Mask determines the account structure (how many segments and how many digits within each segment).
You must set up the GL Mask before doing anything else in the General Ledger. You will not be able to change the mask or number of periods after they've been saved.
Clearing
Work in Progress: The default WIP account for Production and Job Cost.
Payroll: Payroll clearing account.
Equipment: Equipment clearing account.
Inventory: Clearing account used in Inventory Adjustments.
Purchase Orders: Clearing account used between PO Receipt and AP Invoice entry. This account is also commonly referred to as Accrued AP.
Suspense: Suspense account used if the batch generator cannot match a transaction to a valid GL Account.
Over/Under Billing: Revenue contra account for draw billing transactions from Project Control.
Retainage: Clearing account for retainage billings from Project Control.
Retained Earnings: Earnings account for year end close.
Accounts Payable
Payables: The default AP account for all AP Invoices. This account is always used unless another account is specified on the Sold From screen.
Discounts: Discounts taken on AP invoices.
Adjustments: Adjustments made to AP invoices.
Checking: Default checking/cash account when Approving AP Invoices and Printing AP Checks. Also the default account in the Bank Rec.
Purchase Variance: Default variance/balancing account when PO Receipt does not match AP Invoice amount.
Prepay Expense: The default Prepaid Expense account when printing a Prepaid Check.
Accounts Receivable
Accounts Receivable: AR account for all AR Invoices. This account is always used unless another account is specified on the Bill To screen.
Sales Tax: Default Sales Tax account for AR invoices. This account will be used unless another account is specified in the STATES rule.
Cash Receipts: Default Checking/Cash account for cash receipts.
Payment Discounts: Discounts taken on AR Invoices.
Payment Adjustments: Default adjustment account during cash receipts.
Inventory
Stock Inventory: Default inventory control account.
Non Stock Inventory: Default inventory control account for non-stock items.
Return Loss: NO LONGER USED, logic is linked to older shipping logic and is no longer functional w/ NEWSHIP logic. Debited account when stock inventory is returned from a customer and not returned to stock.
Transfer Clearing: Clearing account used for inventory transfers.
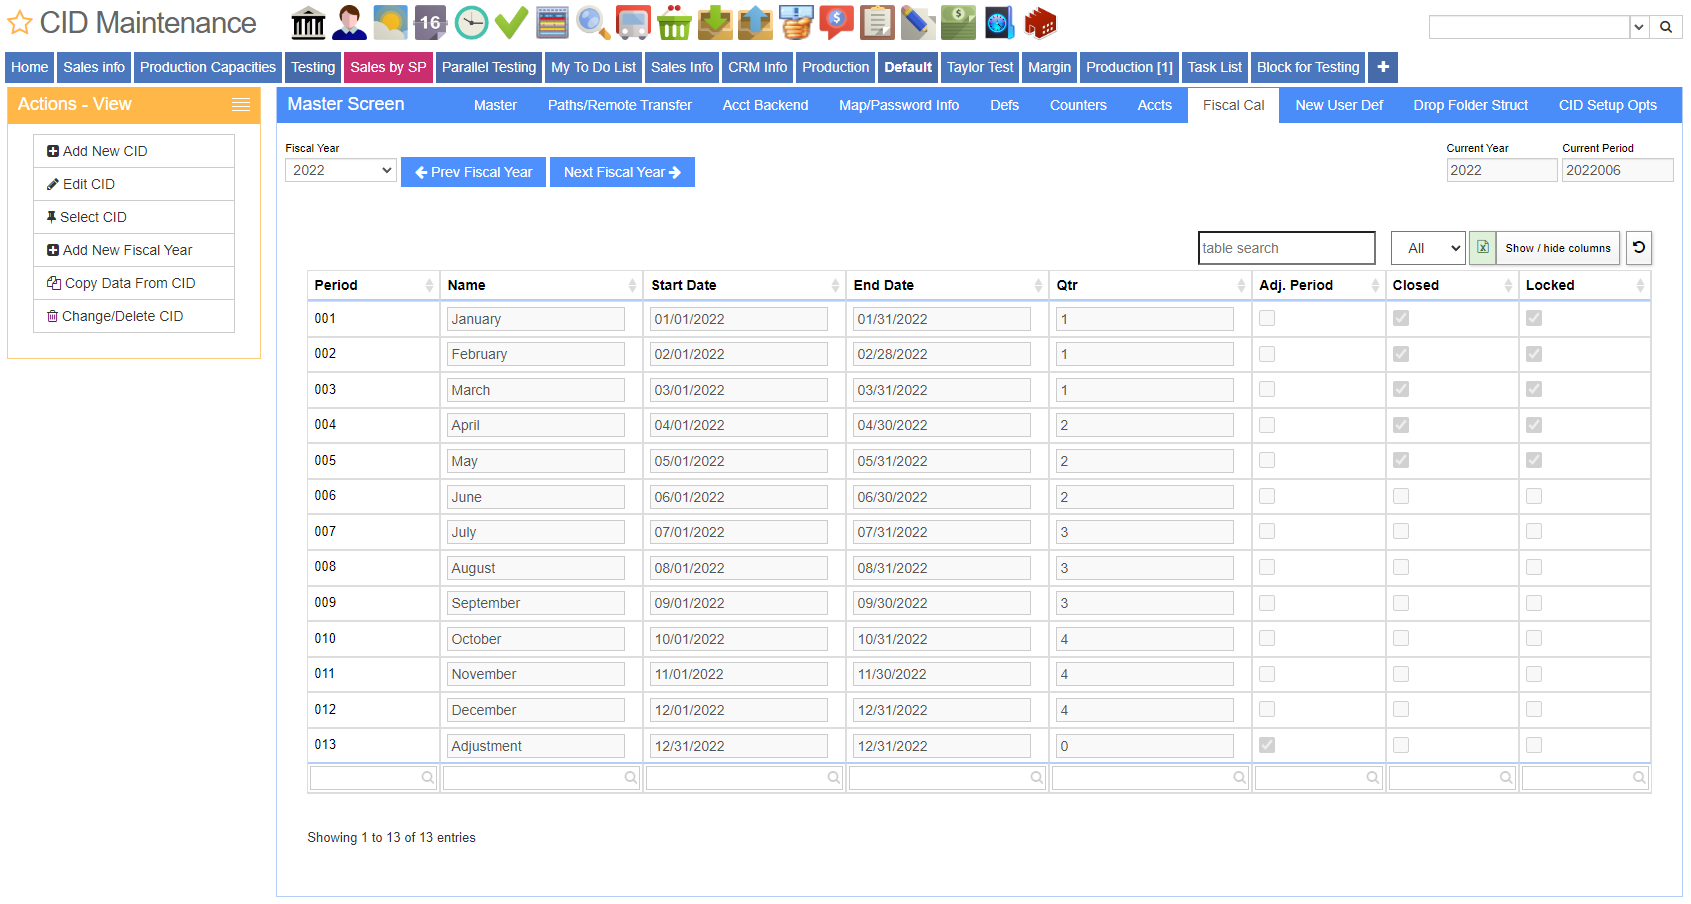
Fiscal Calendar
The fiscal calendar shows each accounting period per fiscal year.
The Current Year and Current Period fields show the corresponding information according to what periods and years have been closed.
You can close a Period/Year by going to: Transaction >> General Ledger >> Close Period/Year.
To set up a new Fiscal Year, type the year in the Fiscal Year field and click Yes when asked if you want to add the year. Fill out the calendar according your company's fiscal calendar or simply click the Fill out DefCalYear button to fill out the calendar according to a normal calendar year.


