Default Menu Location
Transaction >> Importers/Exporters >> Item Control >> Bin ImportGeneral Information
Import new bin locations per warehouse. Separate import lines will need to be created for each Warehouse/Bin combination needed.
 Bin Import Screen |
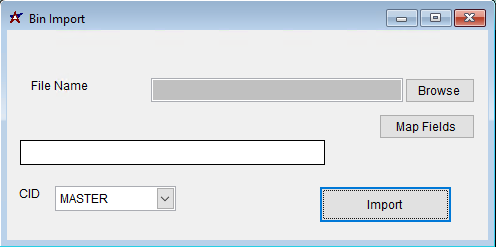
File Name/Browse: Use the Browse button to locate and select the completed Bin Import template file (in XLS format).
Map Fields: Fields must be mapped prior to importing. If no changes have been made to the column headings, the mapping screen should show all green, and you can click OK to continue. If any of the Input Field Name columns on the left are red, single-click on the line on the left column, and then double-click the desired mapped field in the right column to complete the mapping. Repeat for any red lines on the left that should be mapped. If there are additional columns in the source file that should NOT be mapped, they can be left unmapped (displayed in red). Mandatory fields will require that they be mapped before clicking OK.
Sample Bin Import File
The Bin Import does not have an 'Export Template' option. You can either create a new Microsoft Excel file in the Microsoft Excel 5.0/95 Workbook (*.xls) format with the exact column labels indicated in the 'File Definitions' section, or download a copy of the template file from the link below.
Note that the f1-f255 column identifiers and the third row descriptions are not used on this template. The imported data should begin on row 2.
Import Bin Template fileBin Import File Definitions
Required fields are indicated with an *
*WhseName - Warehouse name for the associated bin record. Note that bins are specific to each warehouse location, so separate bin records must be created for each warehouse.
*BinName - Bin name (30 alphanumeric characters max)
Zone - Zone name from the Zone Maintenance screen (if using)
Multi - Enter 'Y', or leave the field blank, to set the 'Allow Multiple Items' flag. Enter 'N' to only allow a single item code for the bin location.
PSNum - Enter a numeric value (whole number, no decimals) to set the Pulling Sequence Number for the associated bin.
TmpLoc - Enter 'Y' to set the 'Temporary Location' flag. If left blank, the 'Temporary Location' flag will be unchecked.
WMSCon - Enter 'Y', or leave the field blank, to make the bin valid in the Warehouse Management Control system. This field should not be set to 'N' unless directed by ABIS personnel.
Active - Enter 'Y', or leave the field blank, to set the bin as an active bin. Enter 'N' to import an inactive bin record.
