PO Receipt
From Adjutant Wiki
General Information
How To Access
- URL PoReceipt_S.htm
- Menu Location Transaction >> Purchase Order >> PO Receipt
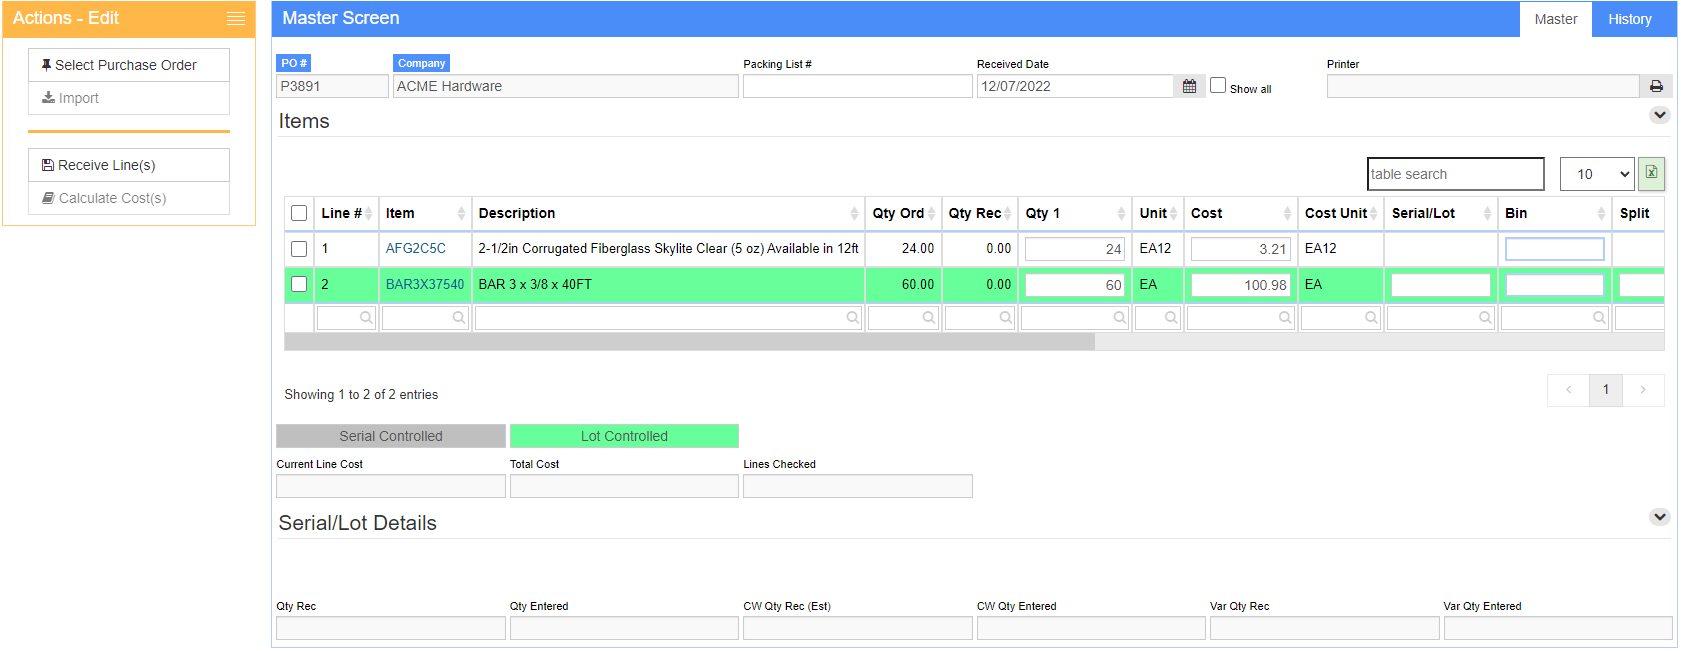
Function The PO Receipt Screen is used mark items listed on open purchase orders as received. In addition to the options above, this screen can be accessed from the Purchase Orders screen by clicking the PO Receipts button in the Actions menu.
Master Screen Tabs
Master Tab
Use this tab to receive, add, delete or cancel lines.
To mark items received:
1. Select the Purchase Order by entering the purchase order number in the PO Number field, or a Packing List number in the Packing List # field.
2. Select the line(s) that has been received and edit line information.
- Qty 1 Quantity received
- Numbers in this field will update Qty Rec once the PO receipt has been saved.
- To track items returned to a vendor, enter a negative quantity in the Qty 1 field of the item line.
- Cost Cost adjustments for items received
- PO Receipts will update the average cost of stock items based on the cost and quantity of the item received.
- Serial/Lot Lot numbers for lot controlled inventory (such as coils)
- Bin Item location
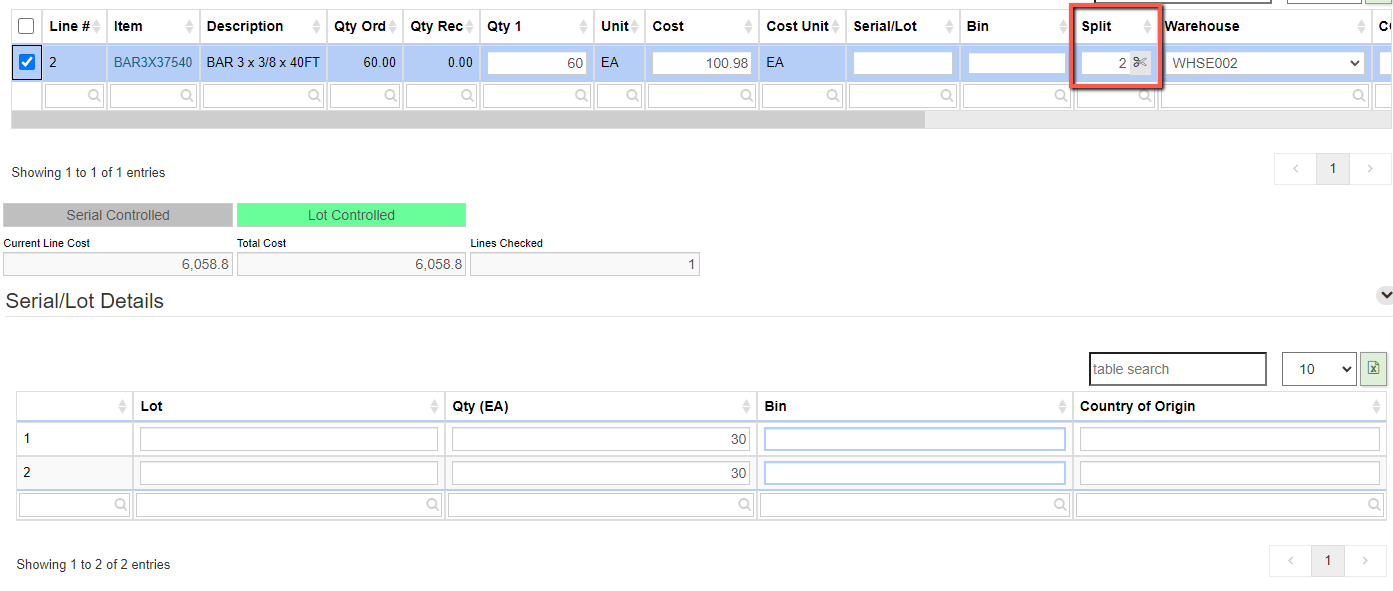
- Split Split Serial/Lot Details for items received
- Use this field if items received belong to more than one lot, or will be stocked in multiple bins. Enter the number of splits needed, and then click the scissors button. Additional lines with Lot, Qty, Bin, and Country of Origin will appear at the bottom of the screen.
- Enter the serial number for each individual item, or enter the first serial number and click Generate Lot/Serial in the Actions menu if the serial numbers are sequential.
- Warehouse Warehouse receiving the stock items
- COO The country the items originated from.
- AP Note Free text field to pass information to the AP Invoice PO line tab.
- Label Count Number of coil tags that should be printed per received coil
3. Click the Receive Line(s) button in the Actions Menu. The PDFs screen will load with PDF PO Receipt.
- Do not save the PO Receipt until you have entered the quantity received for each line item.
4. Items marked received will now appear on the History tab.
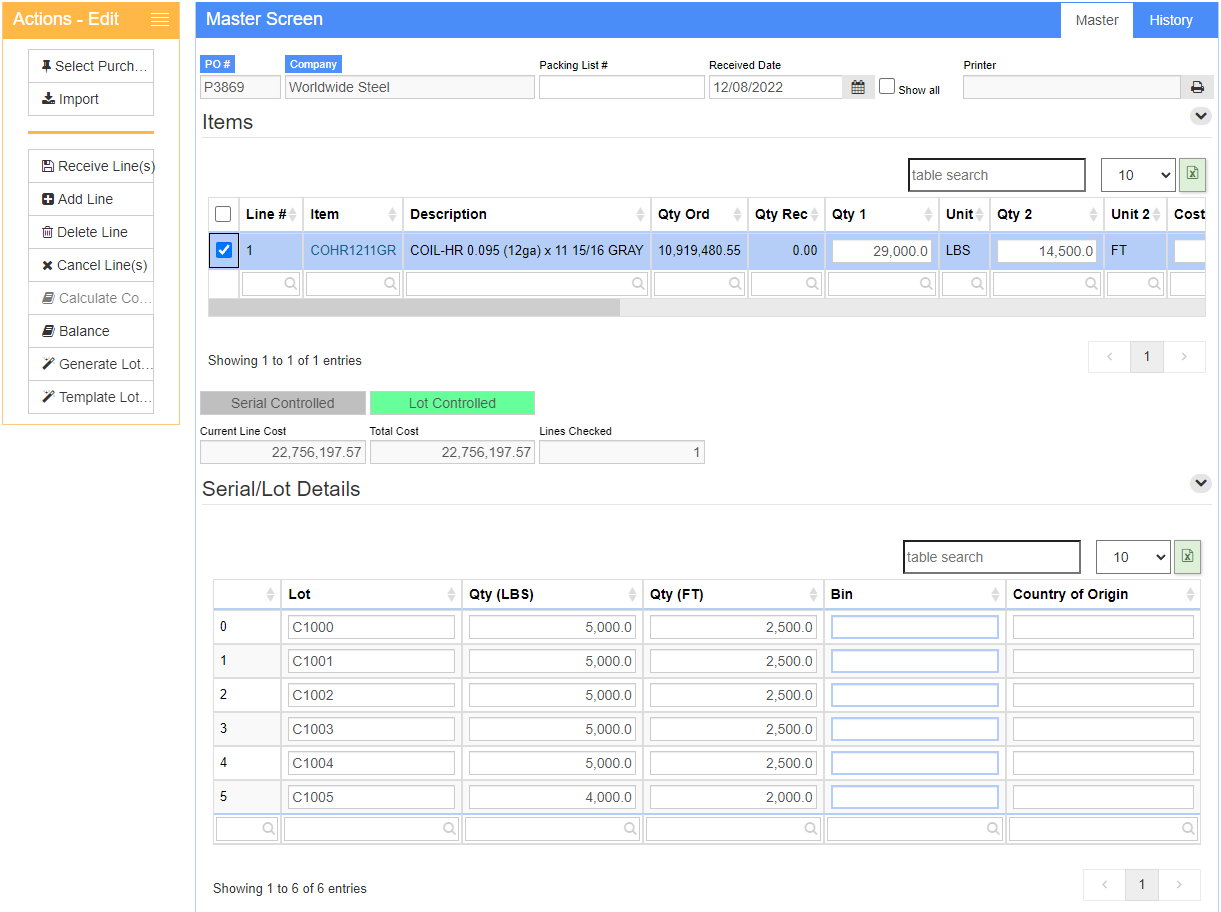
For lines that require several serial/lot numbers, the Import option in the Actions menu should be used.
History Tab
Use this tab to view the history of all items received for the selected PO, along with related data such as date, quantity, location, cost, and so forth.
Lot Controlled Item Receipt Import
For lines that require several serial/lot numbers, the Import option in the Actions menu should be used.
1. Select the Line to be received, and then select the Import option from the Actions menu.
2. Upload your import template, complete with information for the items to be assigned lot numbers.
3. Once the template has been imported, a new Serial/Lot Details section will appear with an additional line for each of the items received on the import.
Coil Information
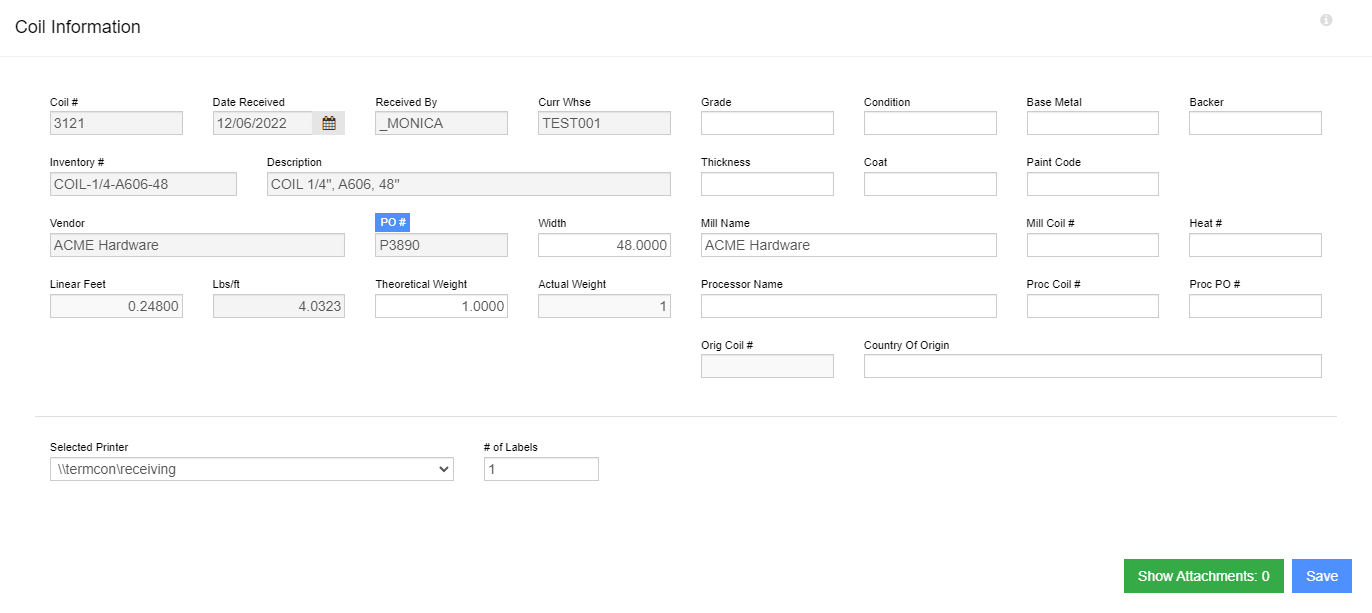
When completing a receipt for a coil item line, the Coil Information pop-up window will appear.
Fields
- Coil # Unique number for the individual coil being received
- Date Received Date the coil was received
- Received By Resource receiving the coil
- Curr Whse Warehouse receiving the coil
- Inventory # Short item name of the coil (Ex: COIL48GA)
- Description Description of the coil (EX: Coil 48 Gauge Galvalume)
- Vendor Vendor from which the coil is being received
- PO # Purchase Order on which the coil was ordered
- Width Width of coil. Will only display if 'Variable Width/Gauge' is selected on the Coil Defaults screen. This can be entered when adding the line to a PO and defaulted in by using a configuration question with an Rcode of 'WI'.
- Linear Feet Linear feet of coil received
- Lbs/ft: Pounds per linear foot
- Theo. Weight The amount the coil should weigh
- This number is the unit weight on the Item Master for that coil.
- Actual Weight Actual weight of coil received
- Grade Grade of coil being received
- Condition Condition in which coil was received
- Base Metal Metal the coils is made out of
- Backer Default backer value for the coil
- Thickness Thickness of metal in inches. Used to calculate the footage based on the density. Will only display if 'Variable Width/Gauge' is selected on the Coil Defaults screen. This can be entered when adding the line to a PO and defaulted in by using a configuration question with an Rcode of 'TH'.
- Coat:
- Paint Code Paint code of the coil being received
- Mill Name
- Mill Coil #
- Heat # Heat # of the coil being received
- Processor Name
- Proc Coil #
- Proc PO#
- Orig Coil #
- Country of Origin Country where coil was made
- Selected Printer Receipt and Label Printer
- # of Labels Number of labels to be printed for coil received


