PO Receipt
From Adjutant Wiki
General Information
How To Access
- URL PoReceipt_S.htm
Menu Location Transaction >> Purchase Order >> PO Receipt
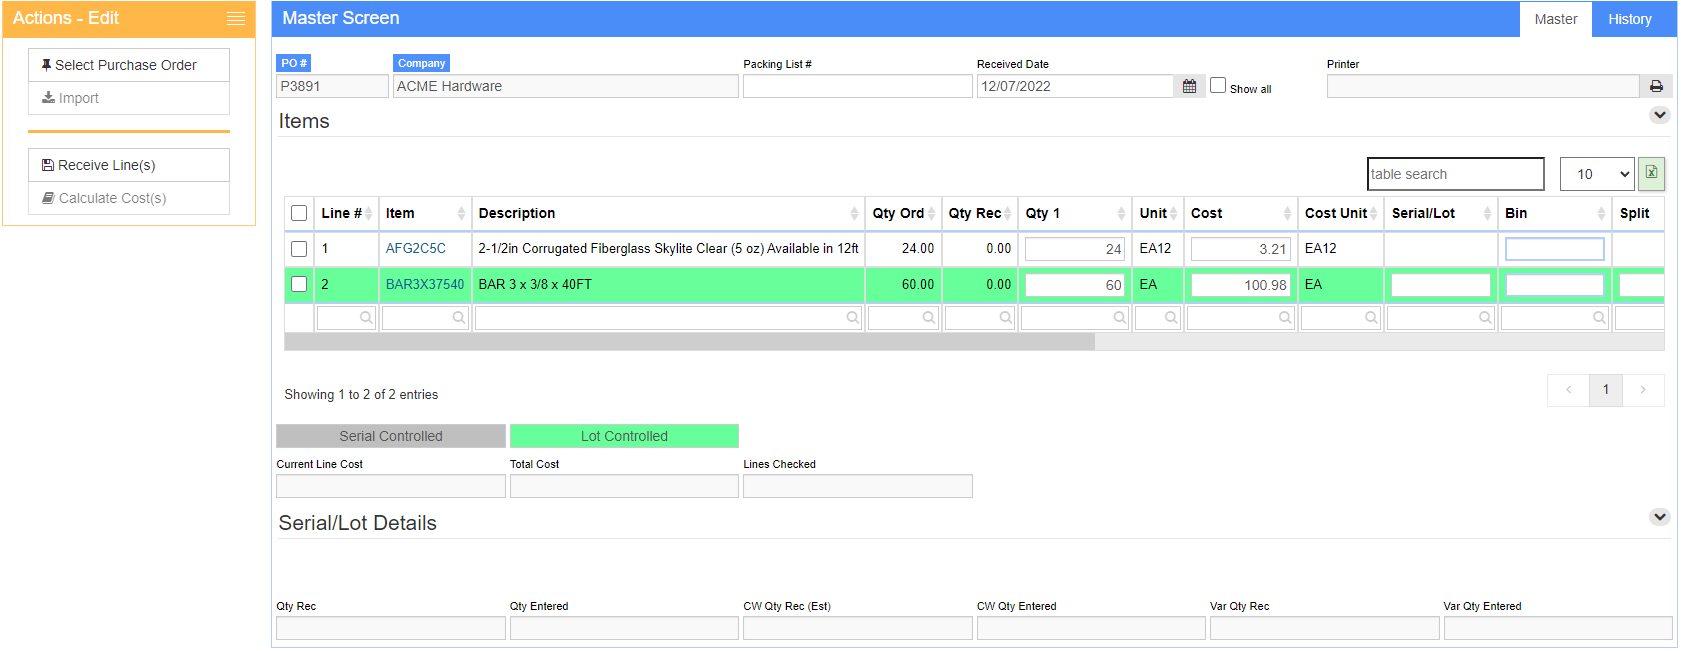
Function The PO Receipt Screen is used mark items listed on open purchase orders as received. In addition to the options above, this screen can be accessed from the Purchase Orders screen by clicking the PO Receipts button in the Actions menu.
Master Screen Tabs
Master Tab
Use this tab to receive, add, delete or cancel lines.
To mark items received:
1. Select the Purchase Order by entering the purchase order number in the PO Number field, or a Packing List number in the Packing List # field. 2. Select the line(s) that has been received and edit line information.
- Qty 1: Quantity received
- Numbers in this field will update Qty Rec once the PO receipt has been saved.
- To track items returned to a vendor, enter a negative quantity in the Qty 1 field of the item line.
- Cost: Cost adjustments
- PO Receipts will update the average cost of stock items based on the cost and quantity of the item received.
- Serial/Lot: Lot numbers for lot controlled inventory (such as coils)
- Bin: Item location
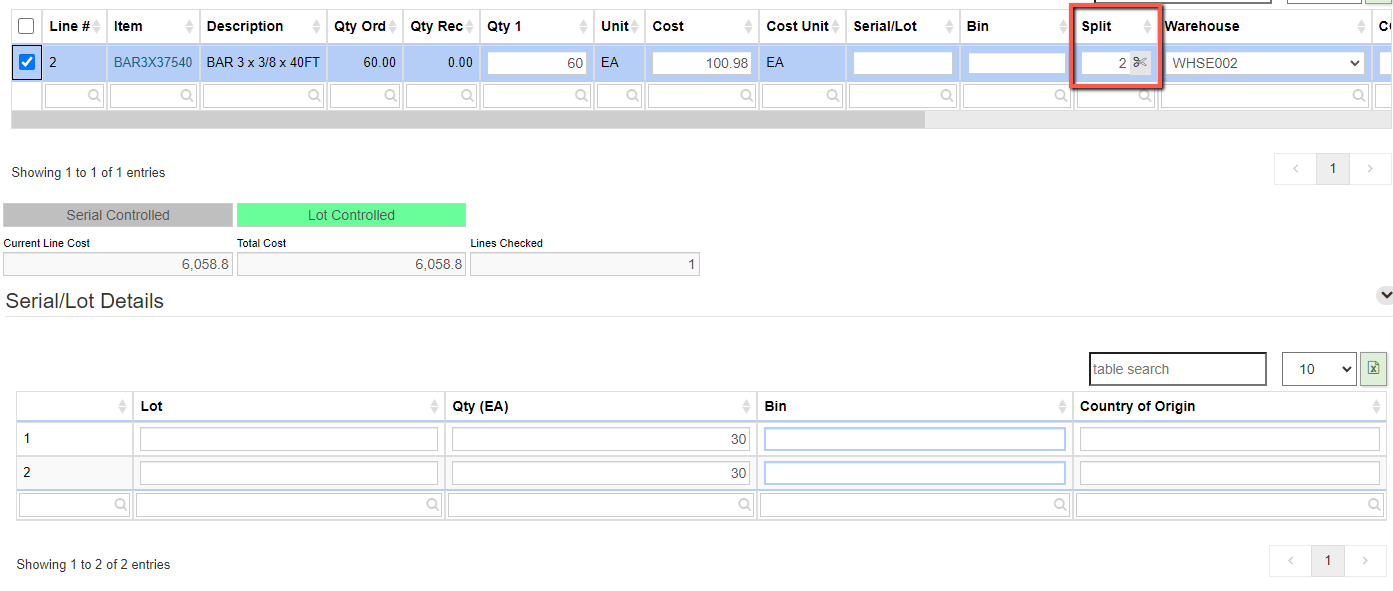
- Split: Split Serial/Lot Details for items received
- Use this field if items received belong to more than one lot, or will be stocked in multiple bins. Enter the number of splits needed, and then click the scissors button. Additional lines with Lot, Qty, Bin, and Country of Origin will appear at the bottom of the screen.
- Warehouse: Warehouse receiving the stock items
- COO: The country the items originated from.
- AP Note: Notes for Accounts Payable
- Label Count: Number of PO labels to be printed
3. Click the Receive Line(s) button in the Actions Menu. The PDFs screen will load with PDF PO Receipt.
- Do not save the PO Receipt until you have entered the quantity received for each line item.
4. Items marked received will now appear on the History tab.
For lines that require several serial/lot numbers, the Import option in the Actions menu should be used.
History Tab
Use this tab to view the history of all items received for the selected PO, along with related data such as date, quantity, location, cost, and so forth.


