How To - Create A New Bill Code
From Adjutant Wiki
This page will explain the steps for creating and maintaining bill codes in Adjutant. For basic information on the bill code and service ticket modules please see our Adjutant Wiki here!
For additional How-To guides please see our Adjutant Work Order MGT wiki!
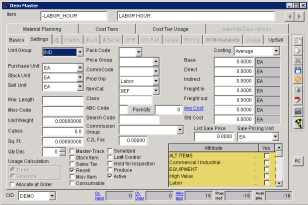
STEP 1: Click the Item Master button located in the toolbar.
STEP 2: Click New and enter the Item and its Description. This will be the billing code and it's description (i.e. -EQUIPOPR and EQUIPMENT OPERATOR).
STEP 3: Select the appropriate Purchase, Stock, and Sell Units from the drop-down menus. This will be HR or EA.
STEP 4: Check the Resell box and enter the price per unit in the List Sale Price field.
STEP 5: Select the appropriate Price Group, Commodity Code, and Product Group from the drop-down menus.
STEP 6: Select the Item Category from the drop-down menu.
STEP 7: Click Save.
STEP 8: Click the OHF (Owner Held For) tab and click New .
STEP 9: Select your company as the Owner and Held For.
STEP 10: Select a Warehouse and the appropriate Item Category from the drop-down menu.
STEP 11: Click Save and close this window.
STEP 12: MAINTAIN >> RULES >> BILLCODE
STEP 13: Click New located on the right-hand side of the screen (not the one on top).
STEP 14: Enter the name of the new Bill Code.
STEP 15: Enter a code and group. This can be any two letters, as long as they haven't been used before in another bill code.
STEP 16: Enter the Adjutant Item Code. This will be the same item code that you set up in STEP 2.
STEP 17: Click Save.

