Difference between revisions of "Non AR Cash Receipt"
From Adjutant Wiki
| Line 10: | Line 10: | ||
| − | To enter a non-AR cash receipt, click the '''New''' button on the top- | + | To enter a non-AR cash receipt, click the '''New Receipt''' button on the top-left of the screen. |
| − | Select the '''Cash Account''' to debit, enter a '''Reference #''', the '''Amount''', and the ''' | + | Select the '''Cash Account''' to debit, enter a '''Reference #''', the '''Amount''', and the '''Transaction Date'''. |
| − | In | + | In the GL Accounts section, enter/select an account to credit and click '''Save GL Account'''. More then one open account may be selected, but the total distributions must match. |
Click the '''Save''' button to save the receipt. | Click the '''Save''' button to save the receipt. | ||
[[Category: Accounts Receivable]] | [[Category: Accounts Receivable]] | ||
Latest revision as of 12:24, 9 September 2022
General Information
Default Menu Location Transaction >> Accounts Receivables >> Non-AR Cash Receipts
Screen Name NONARCASHREC
Function This screen is used to enter non-accounts receivable cash receipts.
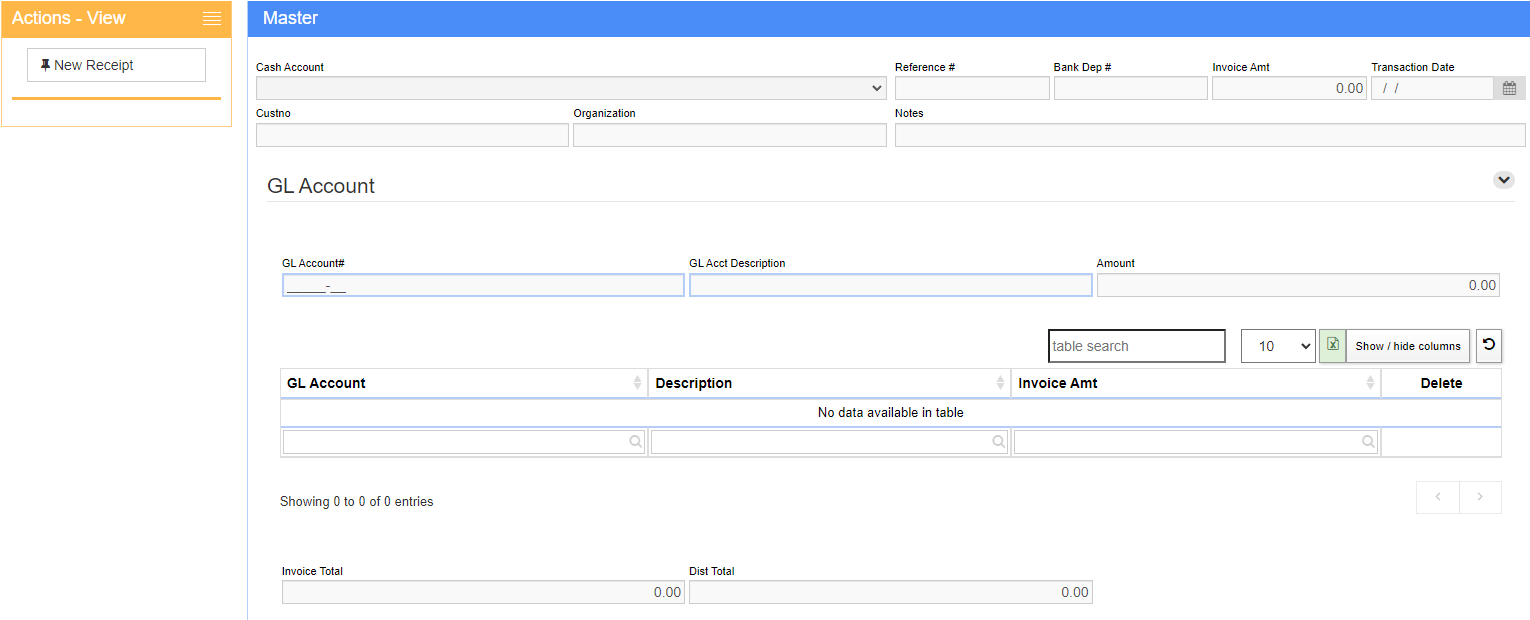
To enter a non-AR cash receipt, click the New Receipt button on the top-left of the screen.
Select the Cash Account to debit, enter a Reference #, the Amount, and the Transaction Date.
In the GL Accounts section, enter/select an account to credit and click Save GL Account. More then one open account may be selected, but the total distributions must match.
Click the Save button to save the receipt.

