Difference between revisions of "Catalog Menu"
From Adjutant Wiki
| (4 intermediate revisions by the same user not shown) | |||
| Line 14: | Line 14: | ||
* '''STEP 1:''' Open '''Catalog Menu Generator''' screen | * '''STEP 1:''' Open '''Catalog Menu Generator''' screen | ||
| − | * '''STEP 2:''' Select Item Attributes from the | + | * '''STEP 2:''' Select Item Attributes from the (This step is to add or modify an existing catalog or to add a new one) |
[[File:Catalog_Menu_Dropdown.png]] | [[File:Catalog_Menu_Dropdown.png]] | ||
| − | |||
| − | |||
| − | * '''STEP | + | * '''STEP 3:''' In the Item Master file select the items you wish to enter into the catalog and give them the catalog attribute you just created. They should also have the SOC attribute if they are configurable items. |
| − | + | [[File:Catalog_Item_Attribute.png]] | |
| − | * '''STEP | + | * '''STEP 4:''' Once all of your catalog items have the new attribute, open the Catalog Menu Generator. |
| − | * '''STEP | + | * '''STEP 5:''' Choose the catalog from the menu list |
| − | * '''STEP | + | * '''STEP 6:''' To create folders for the catalog or to add new prompts in the second field, type the name and click '''Add Prompt''' or choose from the section below the '''Add Prompt''' button |
| − | * '''STEP | + | * '''STEP 7:''' Drag the folders into the left-hand side of the screen to organize them (To create a sub folder, drag the prompt onto the top of the main folder while it is open.) |
| − | * '''STEP | + | * '''STEP 8:''' Search for your catalog items in the bottom part of the screen and drag them to the correct place on the left-hand side of the screen, into the folders |
| + | |||
| + | * '''STEP 9:''' When you are finished with your catalog, click '''Save''' at the top of the screen | ||
| + | |||
| + | [[Category: Item Control]] | ||
Latest revision as of 10:37, 4 January 2022
General Description
Default Menu Location Maintain >> Item Control >> Catalog Menu Generator
Screen Name CATGEN
Function The Catalog Menu Generator is used to create online catalogs
How to Create or Modify a Catalog
- STEP 1: Open Catalog Menu Generator screen
- STEP 2: Select Item Attributes from the (This step is to add or modify an existing catalog or to add a new one)
- STEP 3: In the Item Master file select the items you wish to enter into the catalog and give them the catalog attribute you just created. They should also have the SOC attribute if they are configurable items.
- STEP 4: Once all of your catalog items have the new attribute, open the Catalog Menu Generator.
- STEP 5: Choose the catalog from the menu list
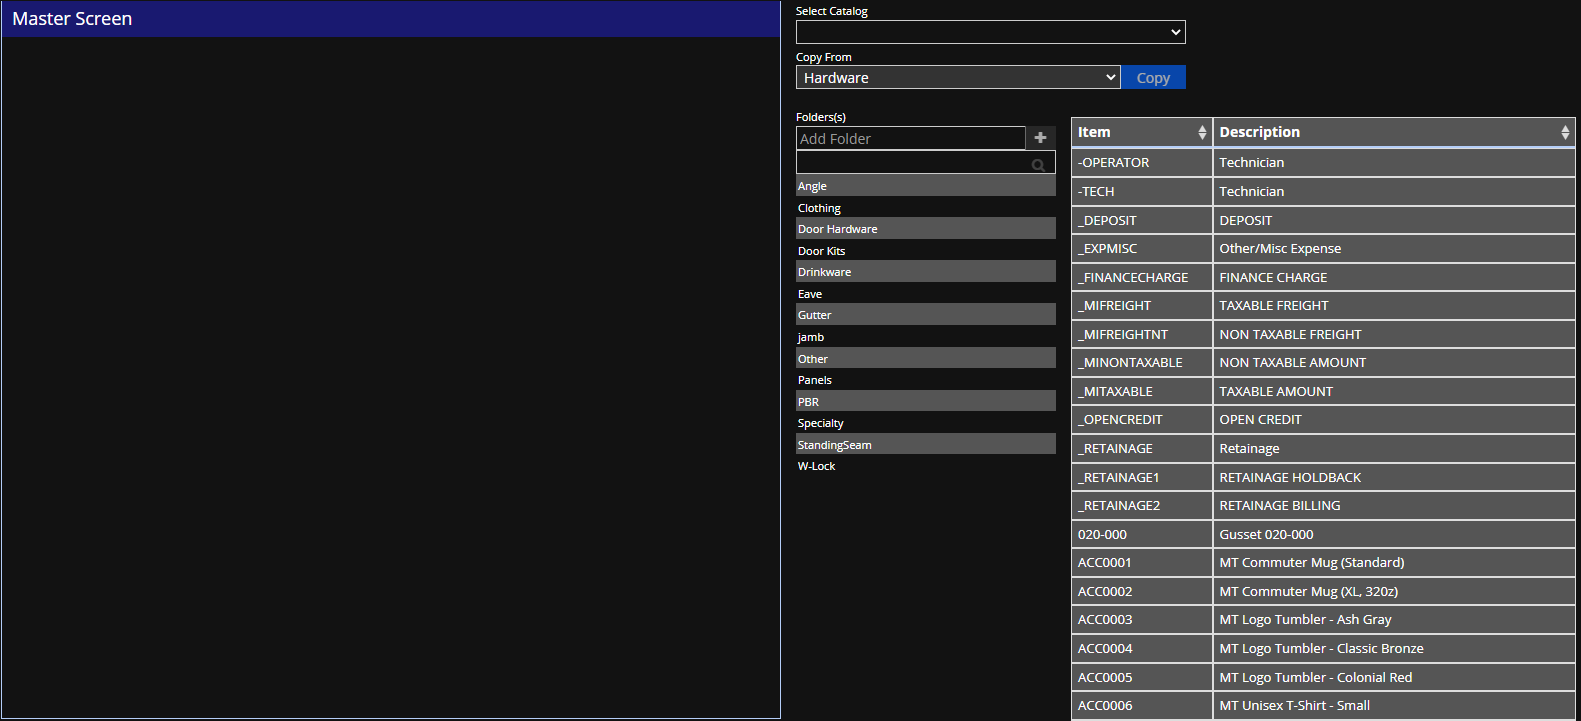
- STEP 6: To create folders for the catalog or to add new prompts in the second field, type the name and click Add Prompt or choose from the section below the Add Prompt button
- STEP 7: Drag the folders into the left-hand side of the screen to organize them (To create a sub folder, drag the prompt onto the top of the main folder while it is open.)
- STEP 8: Search for your catalog items in the bottom part of the screen and drag them to the correct place on the left-hand side of the screen, into the folders
- STEP 9: When you are finished with your catalog, click Save at the top of the screen


