Difference between revisions of "General Ledger Setup Guide"
From Adjutant Wiki
| Line 3: | Line 3: | ||
===Set the CID GL Mask (See MASTER)=== | ===Set the CID GL Mask (See MASTER)=== | ||
| − | [[System Manager Setup Guide#GL Mask|Set the CID GL Mask]] | + | [[System Manager Setup Guide#Set the CID GL Mask|Set the CID GL Mask]] |
*If the GL Mask field in the CID Maintenance – Accounts tab is open for editing, set the GL Mask value to match the customer’s GL account structure, using X and - characters. | *If the GL Mask field in the CID Maintenance – Accounts tab is open for editing, set the GL Mask value to match the customer’s GL account structure, using X and - characters. | ||
Revision as of 11:40, 27 February 2018
Set the CID GL Mask (See MASTER)
- If the GL Mask field in the CID Maintenance – Accounts tab is open for editing, set the GL Mask value to match the customer’s GL account structure, using X and - characters.
- Generally, the GL Mask in the ‘Accounts’ tab must be updated via SQL with the following query
- Update CID set GLMASK = 'X-XXXX-XX' where CID = 'AAAA' (Set the GL Mask to the desired format using X and – characters. Replace ‘AAAA’ with actual CID)
Import the GL Chart of Accounts (See MASTER)
In order to proceed with the CID Setup, the GL chart of accounts (or at least a single GL account) must be set up. If the complete chart of accounts is not available at this point, you can add a suspense GL account manually in the ‘GL Accounts’ screen that will be used to fill in required GL setup fields.
- Keep in mind that any setup fields pointed to the temporary suspense account will have to be reviewed and corrected once the complete chart of accounts has been set up.
- The GL Chart of Accounts import template can be found in the \Data Files\Accounting folder of the Adjutant directory (if copied from MASTER), or a copy can be found in the Implementation Files folder on the FTP.
- Import the customer’s complete chart of accounts using the ‘Chart of Accounts Import’ screen.
- Verify that the imported GL Accounts exist and are correct in the ‘GL Accounts’ screen.
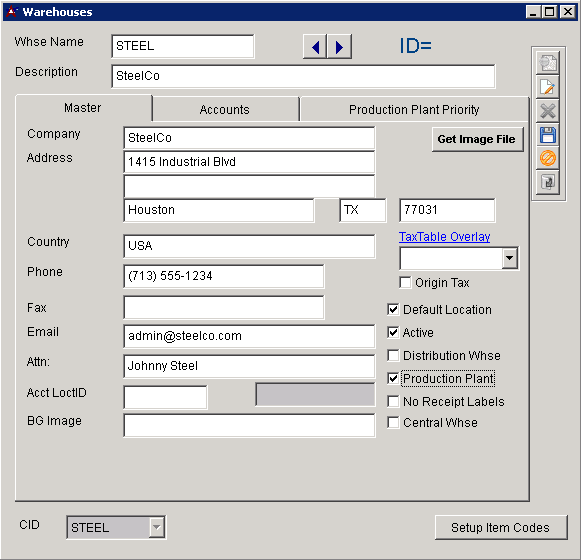
Set Up the Default Warehouse / Held For Records (See MASTER)
In order to proceed with the next steps, you must have added at least one GL account and a default Warehouse. Once you have a chart of accounts, or at least one active GL account, add the default Warehouse record.
- The default Warehouse name should match the CID name. In most cases, the ‘Default Location’, ‘Active’, and ‘Production Plant’ checkboxes should be checked.
- The add process will create a new Organization with a ‘Warehouse Location’ attribute.
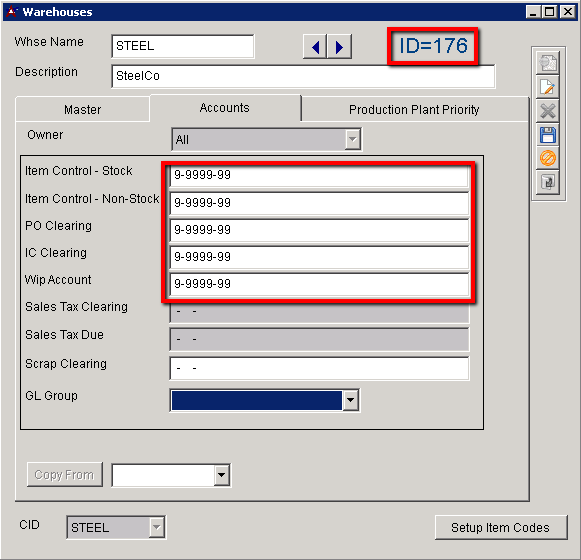
- You must complete the blank GL accounts in the ‘Account’ tab in order to save the record.
- Update the ‘Item Held For Codes’ (HOLDER) Rule Maintenance record with the new customer name and vendor number.
==


