Difference between revisions of "Accounts Payable ACH Setup Process"
From Adjutant Wiki
| (11 intermediate revisions by 2 users not shown) | |||
| Line 1: | Line 1: | ||
__NOTOC__ | __NOTOC__ | ||
| + | ==General Description== | ||
| + | |||
| + | The Accounts Payable ACH process generates an ACH formatted file, known as an AP EFT file, per AP check paid. This file can then be uploaded to your bank to reconcile AP invoices. | ||
| + | |||
| + | ==Initial Setup== | ||
| + | |||
| + | Before this file can be created and used, some basic setup must be completed. | ||
| + | |||
| + | ===Add Vendor's ACH Data=== | ||
| + | |||
| + | '''1.''' Navigate to the '''[[Organizations]]''' screen, and select a vendor. | ||
| + | |||
| + | |||
| + | '''2.''' If the vendor doesn't already have the "Vendor ACH/EFT Data" attribute, click the "plus" sign in the green box on the right, and add the attribute to the record. | ||
| + | |||
| + | [[image:ap_ach_1.png]] | ||
| + | |||
| + | [[image:ap_ach_2.png]] | ||
| − | |||
| − | + | '''3.''' Save the newly added attribute, then click the underlined "Vendor ACH/EFT Data" attribute on the vendor record screen edit it on the '''[[EFT Data]]''' screen. | |
| − | ''' | + | '''4.''' Enter the EFT/ACH data for the vendor and click "save." |
| − | + | [[image:ap_ach_3.png]] | |
| − | |||
| − | |||
| − | - | + | ===Setup the [[ACH Data Setup - ACHDATA Rule|ACH Data Setup Rule]]=== |
| − | |||
| − | '''Rule Maintenance''' | + | '''1.''' Navigate to '''[[Rule Maintenance]]''' and select '''ACH Data Setup - ACHDATA''' from the dropdown. |
| − | + | '''2.''' Select "New Rule Details" to add a checking account to the rule. | |
'''GL Account''' - Here you will specify the checking account from which payments will be made. | '''GL Account''' - Here you will specify the checking account from which payments will be made. | ||
| Line 25: | Line 39: | ||
'''File Name''' - This is where you will specify the name of the file that is generated. | '''File Name''' - This is where you will specify the name of the file that is generated. | ||
| − | '''Format''' - | + | '''Format''' - The Standard Entry Class (SEC) code used by the GL account. You can also use an 'AMEGY' format. Contact your consultant to discuss the correct SEC code. More information on SEC codes can be found '''[https://achdevguide.nacha.org/ach-file-details here]''' |
| − | ''' | + | '''Batch Number''' A number that identifies a group of transactions that the system processes and balances as a unit. |
| − | |||
| − | |||
| − | + | [[image:AP_ACH_rule_Setup.png]] | |
| − | + | ===Setup ACH Checking Accounts=== | |
| − | ''' | + | '''1.''' Navigate to '''[[System Cash/Checking Accounts]]''' |
| − | ''' | + | '''2.''' Add the ACH information to the GL Account referenced in the rule above. |
| − | + | '''3.''' Select the check forms to be used for payments from this account. | |
| + | '''4.''' Define the check numbers to be used for generated checks from this account. By default, check numbers will count up incrementally by 1 with each ACH transaction processed in Adjutant. | ||
| − | + | [[image:setup_ach_ss.png]] | |
| − | + | ===Setup Email Template=== | |
| − | [[File: | + | [[File:EFT.png]] |
| − | == | + | ===[[Generate AP EFT File]]=== |
| − | '''Generate AP EFT File | + | '''1.''' Once you have created an AP check and it has been approved for payment, navigate to the Generate AP EFT File screen by going to '''Transactions > Accounts Payable > [[Generate AP EFT File]]'''. |
| − | + | '''2.''' Select the account from which the payment will be made. The Transaction Date and First Check Number will auto populate based on today's date, and the check counter from the Checking Account screen of the selected account. | |
| − | + | '''3.''' Enter the vendor information for the AP invoice to be paid, and click '''Generate EFT'''. A file will be generated that can be saved and uploaded to your bank. | |
[[File:AP_ACH_Setup_Generate_AP_EFT_File.png]] | [[File:AP_ACH_Setup_Generate_AP_EFT_File.png]] | ||
[[Category:Accounts Payable]] | [[Category:Accounts Payable]] | ||
Latest revision as of 09:34, 22 May 2024
General Description
The Accounts Payable ACH process generates an ACH formatted file, known as an AP EFT file, per AP check paid. This file can then be uploaded to your bank to reconcile AP invoices.
Initial Setup
Before this file can be created and used, some basic setup must be completed.
Add Vendor's ACH Data
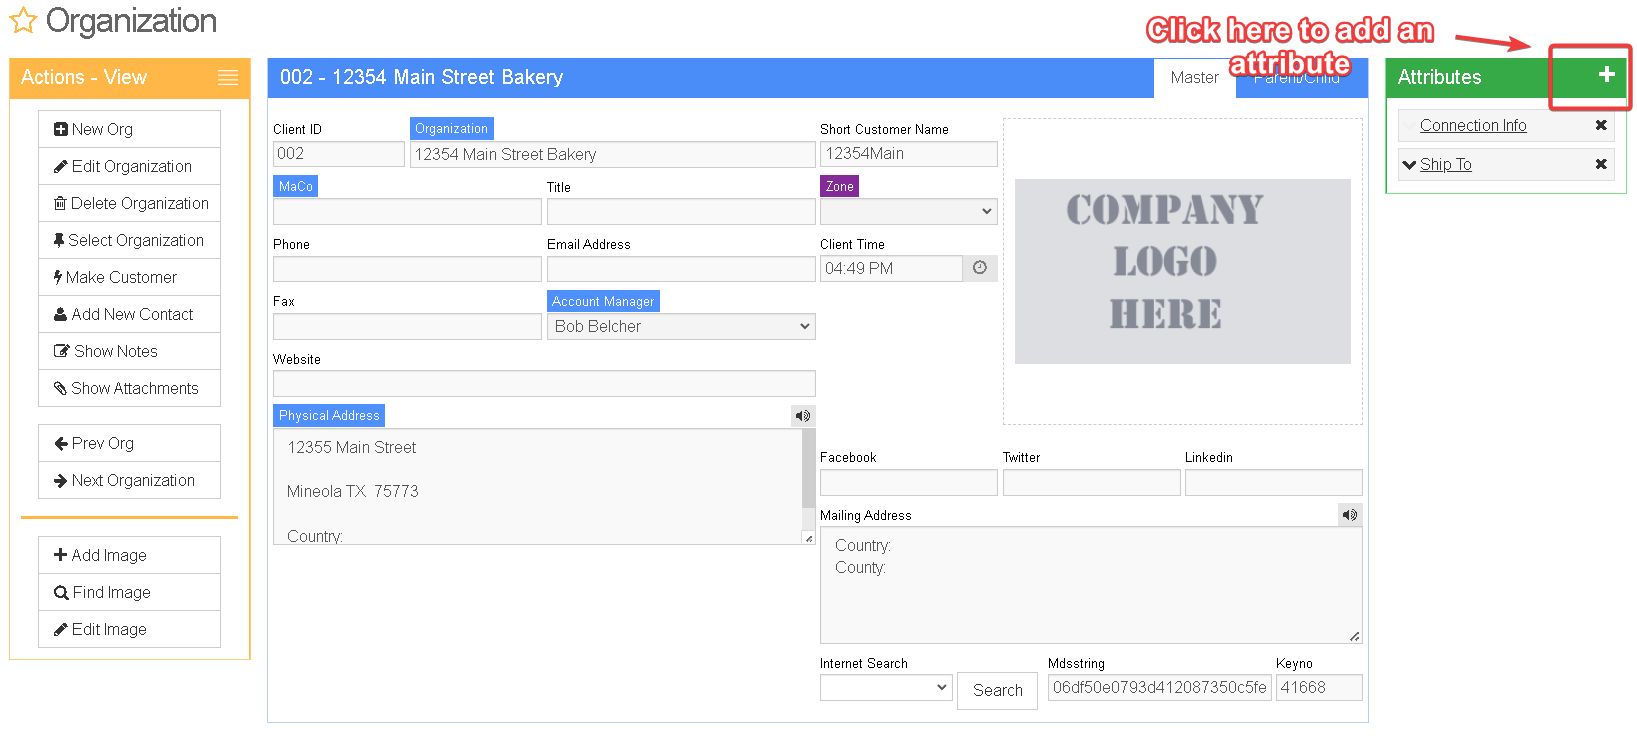
1. Navigate to the Organizations screen, and select a vendor.
2. If the vendor doesn't already have the "Vendor ACH/EFT Data" attribute, click the "plus" sign in the green box on the right, and add the attribute to the record.
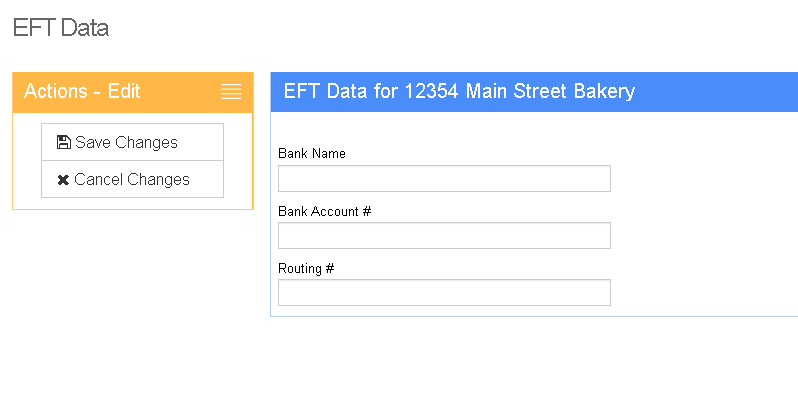
3. Save the newly added attribute, then click the underlined "Vendor ACH/EFT Data" attribute on the vendor record screen edit it on the EFT Data screen.
4. Enter the EFT/ACH data for the vendor and click "save."
Setup the ACH Data Setup Rule
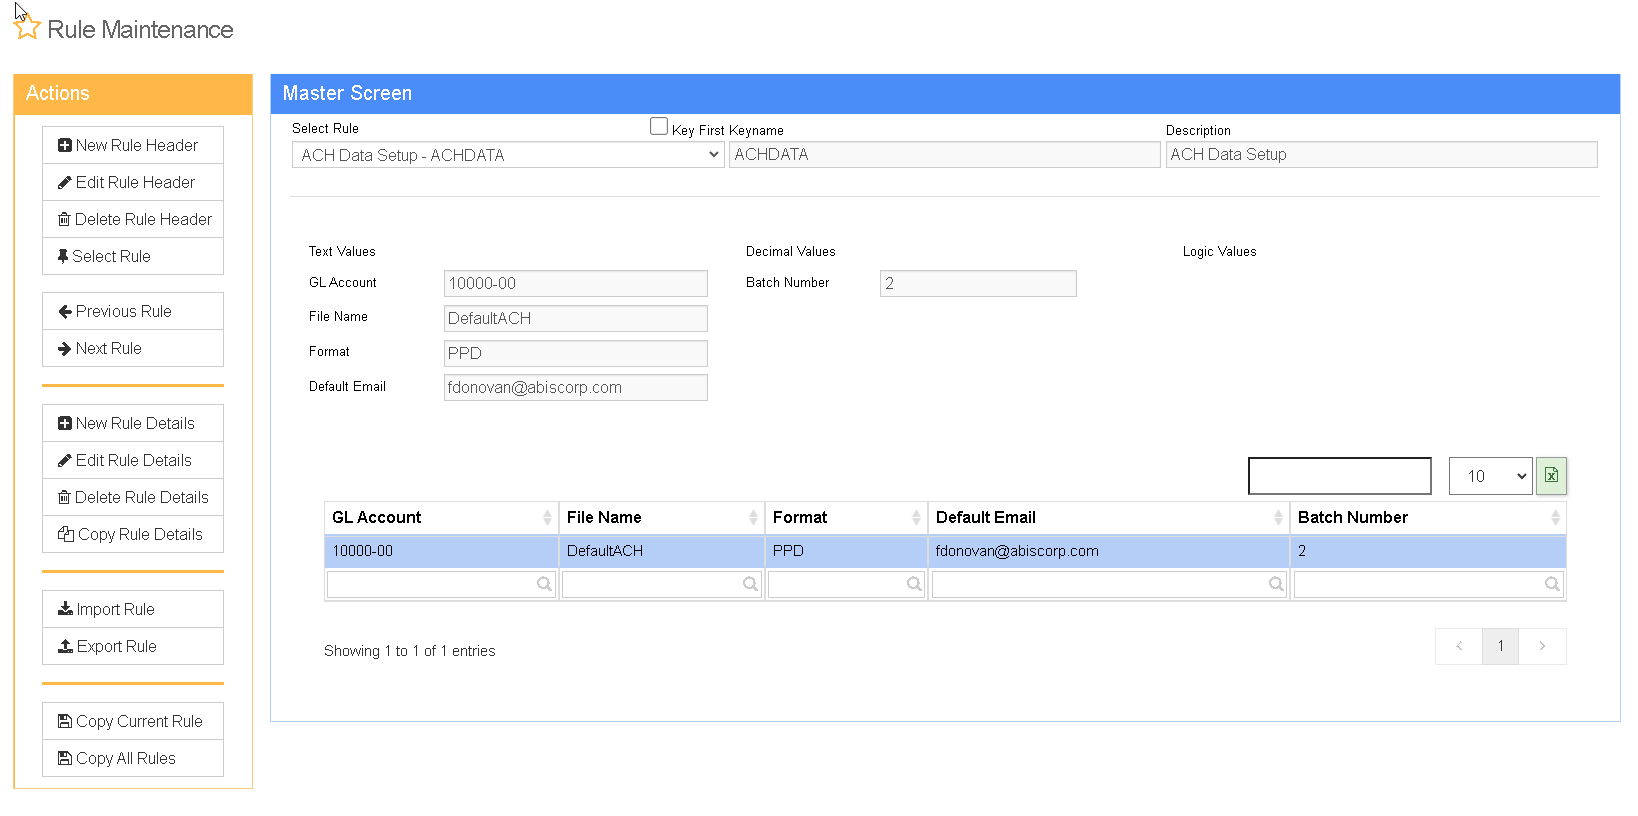
1. Navigate to Rule Maintenance and select ACH Data Setup - ACHDATA from the dropdown.
2. Select "New Rule Details" to add a checking account to the rule.
GL Account - Here you will specify the checking account from which payments will be made.
File Name - This is where you will specify the name of the file that is generated.
Format - The Standard Entry Class (SEC) code used by the GL account. You can also use an 'AMEGY' format. Contact your consultant to discuss the correct SEC code. More information on SEC codes can be found here
Batch Number A number that identifies a group of transactions that the system processes and balances as a unit.
Setup ACH Checking Accounts
1. Navigate to System Cash/Checking Accounts
2. Add the ACH information to the GL Account referenced in the rule above.
3. Select the check forms to be used for payments from this account.
4. Define the check numbers to be used for generated checks from this account. By default, check numbers will count up incrementally by 1 with each ACH transaction processed in Adjutant.
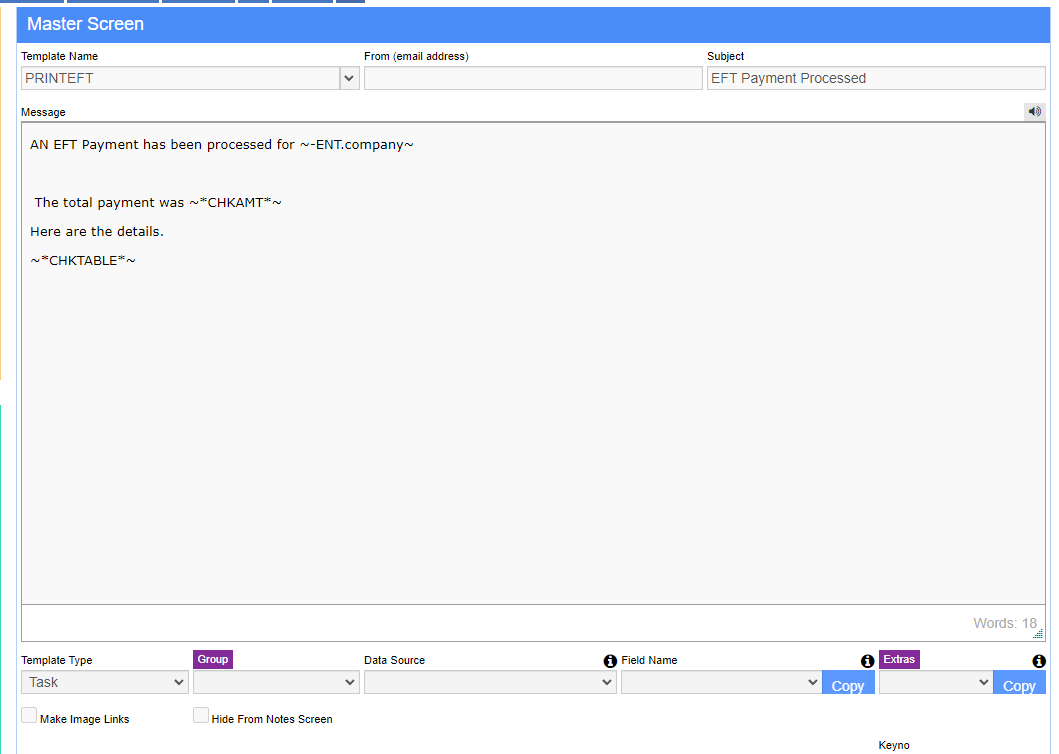
Setup Email Template
Generate AP EFT File
1. Once you have created an AP check and it has been approved for payment, navigate to the Generate AP EFT File screen by going to Transactions > Accounts Payable > Generate AP EFT File.
2. Select the account from which the payment will be made. The Transaction Date and First Check Number will auto populate based on today's date, and the check counter from the Checking Account screen of the selected account.
3. Enter the vendor information for the AP invoice to be paid, and click Generate EFT. A file will be generated that can be saved and uploaded to your bank.


